Arrive on Time
At the risk of being nanny-Bear, one of the most-important things you can do to improve your own cycling experience is to arrive on time to group rides. Each ride gives you a small buffer: “8:00 a.m. meet up, 8:30 a.m. ride out.” Do not interpret this to mean that you can arrive at 8:30. You cannot, and doing so is both counter-productive to you and inconsiderate of other riders.

Showing up late means everyone has to wait for you. It means those who arrived on time may become justifiably impatient. They’re justified because their breakfasts (which were intended to see them through the morning) have more time to digest, leaving them possibly with a calorie deficit for the first part of the ride. It pushes lunch further out. It pushes rides-end further out, too. Most of us have busy lives, and, having already dedicated most of the daylight hours to cycling, probably have important catch-up in the evening.
Needing to get home means faster riders are less likely to regroup with slower riders at meet up points. It also means the training ride leaders (“TRLs”) will be stretched all that much more thin; no experienced riders means fewer people to help with flats or questions. Which means slower riders will get less attention to help them improve.
The less-experienced riders, having arrived on time and waited for you, now have to either endure the cold while you suit up, or the heat because a morning ride got pushed to include afternoon hours. Cold muscles or too much heat means they have more obstacles to contend with…all because they had to wait around for a few minutes.
Now everyone is just that tiny bit more stressed or unprepared. That means you have fewer resources of friendly help which could have been available if you’d arrived at the meet up time. A TRL may have to re-read the safety speech so you can ride. Someone has to pull the sign-in sheet out of their car. Everyone has to pee. No one is going to be happy with you for arriving late.
If you’re going to be late, I do not want to discourage you from going to the ride. Its true: sometimes it happens. Your dog barfed, there was unexpected traffic, you had to change a flat before leaving. Fix the issue then go. But if you do, please prepare the group as best you can:
- Call ahead. Call a TRL or a friend who is riding and let them know you’re going to be late.
- Arrive ready to ride, if you can. Make sure you’re wearing your kit, your tires are pumped, your water bottles are full, and your bladder is empty.
- Expect that you may not get the route sheet. If possible, download the route into your Garmin, or pre-print your own route sheet.
- Anticipate that you may have to “skip” this ride. If you get there after everyone has gone, you certainly cannot go on the ride. But if the sweep is still there, she may be able to sign you in and do a quick safety speech with you.
- Go rogue, but only if you’re comfortable doing so. No one can stop you from riding, but if you arrive without hearing the safety speech or signing in, you cannot be considered part of the official ride.
So, use your morning pre-ride time wisely. Get ready the night before, if you can, so you can jump on your car or onto your bike without searching for your stuff. Make sure you know where you’re going and how long it will take for you to get there. Get to bed on time. Then make sure you’re out the door on time.
Everyone is late from time to time. But we have 30 weeks, 30 training rides, to get through together. Don’t make a habit of being late!
Love,
Your Bear
PS: Writing this blog takes considerable time and effort. If you find it useful, please consider making a small donation to my ride: http://tofighthiv.org/goto/bearalc.
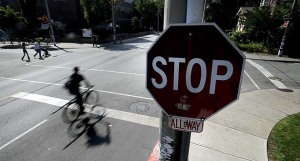
Stop at the Damned Stop Sign
Yes. It is true. Even Bear has a rebel streak. Yesterday I was stopped by a cop for running the stop sign at the corner of Sinclair Road and College Town Drive at Sacramento State University. I was turning left onto the bike trail running parallel to College Town to approach the tunnel toward Elvas. The cop was right in front of me, parked on the bike trail. I slowed as I approached the stop sign and looked left and right. No cars were coming, so I turned.
As I entered the bike trail, I heard the cop’s loudspeaker, “You on the bike, stop!” Of course, I did. What follows may not have been the entire truth from me, but was fully respectful:
Cop: Are you familiar with Vehicle Code 21200?
Me: No, Sir. (Sort of lying.)
Cop: Under the Vehicle Code, bicycles are subject to the same rules as cars, did you know that?
Me: Yes, Sir.
Cop: Do you know why I stopped you?
Me: Because I ran the stop sign. (Pointing.)
Cop: So I could give you a ticket for running that stop sign. Tickets for running stop signs are $250, plus the court will charge you over $50 for processing.
Me: Woah.
Cop: Plus, I pulled you over because its dangerous. Who do you think will win in an accident between you and a car?
Me: Not me, Sir. (Fully keeping my mouth shut about the fact that there were no cars.)
Cop: That’s right. You might not die from an accident on this road, but you’d probably end up in a wheelchair. (Possibly an exaggeration.)
Me: Yes, Sir.
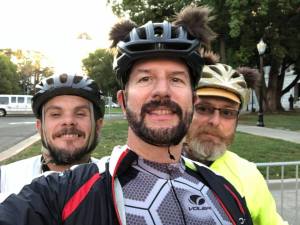
Cop: I’m not going to give you a ticket today, but with that distinctive helmet, I’ll know if I see you again. If I catch you running the stop sign, I’m going to give you a ticket. OK? (See Exhibit A.)
Me: Yes, Sir. Thank you, Sir. (Refraining from asking for a selfie with him, as I was mentally planning this blog post.)
The moral of this story is that the AIDS/LifeCycle Safety Rules are not just words or a way for the ride to shift liability onto you. They are there for your safety and the safety of others. And they are there to keep you from getting tickets.
So learn the lesson from me so you don’t have to.
Love,
Your Bear
PS: Writing this blog takes a significant amount of time and effort. If you find it helpful, please donate to my ride. My heart and mind are with my friend in Napa, Sonoma, and Solano counties, places I cycle in often.
Change your Flat
The AIDS/LifeCycle is a fully supported ride. So, I don’t need to know how to change a flat, right? The Training Ride Leaders will do that for me, won’t they? Besides, I live in a city. There’s always some kind cyclist willing to lend a hand.
The answer is no. Just no. There’s so much wrong with that logic that the discussion has to start out from the basics. Before I help you learn to change a flat, lets learn about what goes into a road tire. (Skip to TL;DR for steps and a video.)

A. Components
Just to get terminology straight: The big roundy thinks with the spokes is called a “wheel.” The rubber part that touches the road as you ride is called a “tire.” Inside the tire is a flimsy inflatable torus called a “tube.” When you “fix” a flat or “change” a flat, you’re most likely not changing the tire, but the tube.
Road bicycle tires are never solid. All of them have tubes. (Yes, there are tubeless kinds, but I don’t discuss those here. Tubeless are not a good choice for most cyclists.) Even the best tires (those with Kevlar linings and beads, such as the ubiquitous Gatorskins) can and will get punctured. And when the tire gets punctured, the tube is usually toast.
B. Mechanics
The wheels are attached to the bicycle at the “hub.” As you ride your bike, the hub bears the weight of the bike-body system. The tire, being a torus (doughnut-shaped thing) with the hub running though it, must be fully removed from the bike before a flat can be changed.
You may laugh or have skipped the above paragraph as obvious, but it is not. I have seen many stranded riders, their tire and tube dislodged from the wheel, looking perplexed about how to get the tube out to be changed. (Read my posts about bonking and eating for more on how a rational person could get to that point.)
C. Types of Flats
There are three broad categories of flats: puncture flats, pinch flats, and herniated flats (I have no idea if these are official names, but the names are instructive). Puncture flats mean that something (glass, a nail, a staple, a tiny shard of metal, a thorn) has embedded itself into the tire and put a hole in the tube. Avoid these by getting better tires, such as Gatorskins.
Pinch flats generally occur when there is insufficient tire inflation for the tire, and the cyclist has hit a rut or hole in the road causing the tube to wedge between the tire and the wheel’s rim causing a hole. Pinch flats can also result from improper tire installation (user error). Avoid these by learning how to install the tire and always re-inflate the tire when starting a ride.
Herniated flats occur from damaged or old tires. When the tire material rubs through or is cut in some way, the inflatable tube can poke out (herniate) through the opening due to tire inflation pressure. Avoid these by visually inspecting the tires before riding and replacing the tires often.
Flats may also occur if there is damage (either manufacturing or otherwise) to the inflation stem (the thingy on the tube that lets you put air into the tube).
D. Types of Tubes
Road tires are determined by two metrics: size and valve type. Typical tires are 700 cm in diameter and about 18 to 27 cm in thickness. You can tell what size tube to buy by reading the tire size off the sidewall of your tire. Most road wheels have holes for Presta values (the thin, pointy kind you have to unscrew to open up, while other kinds of wheels have Schrader valves (the kind used in automobile tires).
The only other thing you might want to know is the depth of the valve itself, if you’re using Presta. Do NOT get the shortest possible valve stem. If you do, there’s a chance your pump will not be able to connect to the value end and you won’t be able to inflate the tube. (Here’s a link to a tube buyer’s guide.)
E. What you need
To fix your flat, you will need the following:
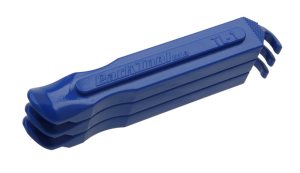
- Tire levers,
- An un-damaged tube (either new or patched),
- A pump or CO2 cartridge system.
Most wheels have quick release pins holding the wheel onto the bike by the hub. If your bike does not have quick release, you’ll also need a wrench.
These things you will need to carry with you at all times. Choose wisely. You should also
invest in a floor pump for your car or home. You’ll get better tire pressure with the floor pump.
F. Proper Tire Inflation
The proper inflation will be listed on the tire’s sidewall. Typical road tires need to be inflated from 90 to 120 psi. You don’t necessarily need to inflate to the full level for good riding. Try different inflation levels, but always stay within the manufacturer’s range.
It is important that you check tire inflation before every ride. So get a good floor pump for home or your car that has a gauge on it. If the inflation is low, put more air. If its too high, let some air out and check again.
G. Changing the Actual Tube (TL;DR)
Here are the steps you need to take to fix your tube. This post is already too long, so I’m only listing the steps and not going into excruciating detail. But you should watch the video which follows and then search YouTube for additional videos.
- Front or back tire? If you’re lucky, it was the front tire. If not…doh!
- If it was the rear tire, shift into the big chain ring in the front; small cog in the back. You’ll have to lift the rear tire to accomplish this. This will make the wheel much easier to install after you’ve removed it.
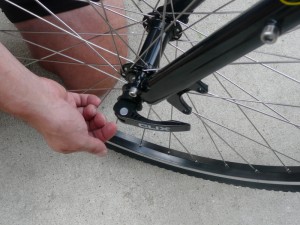
- Take the wheel off the bike. Lay the bike, chain side UP, on the ground in a safe location. If it was the rear wheel, be careful not to get dirt on the cassette!
- Visually inspect the wheel before proceeding. Is there any obvious damage? Can you see the pin or thorn which caused the flat? Is the tire severely damaged? If you can find the culprit, you can remove it easily and possibly patch the tube.
- Unscrew the valve and let out any remaining air.
- Using the tire levers, remove one side of the tire from the wheel. (If you remove the tire entirely, note that road tires are generally directional. So when you reinstall it, make sure its facing the right way.)
- Remove the tube from inside the tire. You may have to remove a small silver nut from the valve stem. That is used to make inflation easier, so if your new tube doesn’t have one, save it.
- If your visual inspection did not reveal the culprit, run your hands gently inside the tire, feeling for sharp objects. Be careful that you don’t get cut. If you find it, remove it and keep looking. If you don’t find it, keep looking until you get bored…it might have dislodged itself or you might have had a pinch flat.
- Unfurl the new tube. Open the valve and blow a little air into it with your mouth. Close the valve stem. This makes it easier to install.
- Put the new tube’s valve stem through the hole in the wheel, then nest the new tube inside the wheel.
- If you took the whole tire off, align the tire in the correct direction with the wheel. Holding the wheel and tire with one hand, lever the inside edge of the tire onto the wheel’s rim.
- Then, starting at the valve stem, using only your fingers and palms (not the levers), lever the outside edge of the tire onto the wheel. Make sure the tube does not get pinched between the tire and wheel (hence the air).
- When you get to having only a few inches left to lever on, you may want to let a little air out of the tube. That may help. But any way you slice it, those last few inches can be grueling. Using your palms, kneed each side of the remaining few inches until it pops on. Keep checking that the tube is not pinching!!
- Only if you absolutely cannot do it with your hands, lever ONLY the last couple inches onto the wheel. If you use the levers too early, you will certainly pinch the tube and have to do it all over again.
- Check that the tube is not sticking out anywhere by squeezing the tire and looking down into the wheel well. if you see any tube, it might pinch when you add air.
- Open the valve and using your pump or CO2 cartridge, put a little air into the tube until it is much firmer, but not hard. Close the valve. Check that none of the tube is poking out between the wheel and the tire. If it is, quickly deflate and try again.
- Once you are satisfied, put as much air into the tube as you can. If you’re using CO2, use the remaining bit of cartridge. If your pump as a meter, put the full amount of pressure you can, up to the pressure listed on your side wall. If your pump doesn’t have a meter, put as much air into the tire as you can…you probably cannot over fill it. If the ride is bouncy, stop and put more.
- Once you get back to civilization, find a floor pump. If you used CO2, remove it and put air. CO2 molecules are smaller than the pores in the tube and will deflate over time.
Watch this video, then Google more and watch them, too.
H. For the Love of the Goddess, Why do I need to know all this?
You need to know how to do this because some day you may find that your TRL’s are helping another rider elsewhere along the route. You’ll either have to wait, call an Uber Extreme (or whatever that’s called), or do it yourself. You’ll find that doing it yourself is faster, easier, and more gratifying. Then, when you see someone stranded on the side of the road, you can say, “Hey, let me help you with that.”
I. Final Word
Practice. That’s it. You won’t know how to do it, so do it. Take your tire off your bike and go for it. If you’ve never done it before, give yourself two whole hours. You can do it. I know you can. Plus, if you do it now, you’ll have the safety of being able to go the bike shop if you abjectly fail! 🙂
Love,
Your Bear
PS: Writing these posts takes a lot of time and effort. If you found this useful, consider donating to my ride at: Bear’s Donation Page.
Cleaning your Bike will make it Last Longer
Keeping with the spirit of the title says it all, please read the title. Keeping your chain clean will keep your bike running smoothly, will let the components last longer, and will keep your bike repair bills low (a Shimano Ultegra chain costs $25, a Shimano Ultegra hub costs $45, a Shimano Ultegra chain ring costs about $179). FYI, if you don’t clean your bike, these will fail in this order: chain, hub (aka cassette), chain ring.
But I know, cleaning your bike can be daunting. Its easy to worry about doing it wrong, but little you can do will ruin your drive chain…and NOT cleaning is will certainly do so. Watch this video about cleaning hacks that work (and a couple that dont), and you’ll see, all you really need is a bucket of soapy water and some degreaser:
Search around on YouTube to find more detailed descriptions of cleaning your bike.
Here is an easy list of how to clean your bike:
- As often as you like, but not less than every 100 miles, clean your chain and bike frame.
- Shift into the big cog on the chain ring, and the smallest cog on the cassette.
- Choose one of the methods in the video, and clean the chain, chain ring, cassette, and derailleurs.
- Dry the entire bike with a rag, then let the bike air-dry completely. (If you did a quick clean with an oily rag (or rubbing alcohol, which works), for instance, drying time is minimal. If you cleaned with soapy water, drying overnight is not amiss, but possibly unnecessary.)
- Add chain lube. (If you cleaned with an oily rag or alcohol, you can likely put a thin stream while spinning the chain about three times. If you did a thorough clean with degreaser-of-choice, put a tiny drop on each link.)
- Using a clean-ish rag, wipe the chain very thoroughly. Post-lube, you really cannot wipe the chain enough.
- Make sure the frame is clean, too!
Do this throughout the season, and 90% of your mechanical issues will disappear like tacos after a century.
Love,
Your Bear
P.S., These blog posts are time consuming, though gratifying to make. If you found them useful, please consider donating to my AIDS/LifeCycle ride at: http://tofighthiv.org/goto/bearalc.
Danger Zone
Riding is fun. Riding is healthy. Riding is good for you. Riding is a sport everyone can do. But one thing riding is not is inherently safe. The only way you can make it safe is by paying extra caution when riding. Even then, things happen. You can follow all the rules, but still someone can become injured on your rides.
First and foremost, no matter what else you do, wear your bicycle helmet. Should you fall, one of the first things that is likely to happen is that you hit your head on the pavement. Your skull is not up to the task. Only approved helmets should be worn. There are many websites dedicated to bicycle helmet safety, such as the NIH, the Bicycle Helmet Safety Institute, and Consumer Reports. Anyone who rides without a helmet is a fool. Do not mimic them!
That being said, I need you to repeat these rules like a mantra every time you ride:
- I will ride as far to the right as is safely possible.
- I will ride predictably so cars and cyclists are not surprised by what I do.
- I will always signal so those behind me know what I’m doing.
- I will leave enough space in front of me so I can stop if I need to.
- I will stop at all traffic control signals.
- I will look behind me if I’m going into the lane, and periodically to make sure nothing bad is coming.
- I will pay attention so that I will have enough time to react to changes in road conditions.
- I will practice emergency stops so I can stop quickly if an emergency arises.
- I will never ride two abreast on roadways.
- I will call out loudly in my best outside voice so riders around me know what I’m doing.
Do all that. Please. I wish I could promise you that will keep you safe. I cannot do so. So make sure you have your phone on you on all rides. Keep emergency contact information available. Be sure to collect the names of all witnesses and insurance information if necessary. Do not hesitate to call 911 if the situation merits it. Someone’s life could be in your hands.
Be safe. Your Bear needs you.
Love,
Your Bear
PS: Making these blog posts takes a long time. If you found this useful, please donate to my 2018 AIDS/LifeCycle ride!
Never Cross the Yellow Line
The title says it all. Ride in the right hand lane as far to the right as is safely possible. There are times when you need to move out into the lane. For instance, when cornering, when passing cyclists, to avoid obstructions, or if road conditions in the curb are too poor for safety. As a vehicle, you are entitled to take the full lane. Look behind you, make sure it is safe, and take the lane.

But it is never safe for a cyclist to move so far left as to enter on coming traffic. Repeat that to yourself: yellow line bad. The simple fact is cars barely pay attention to cyclists traveling in the same direction. They have no attention for the slim profile of an un-illuminated cyclist heading straight for them.
I’m sure you’re thinking: I get it. In heavy, urban traffic, or on blind corners, that is wise advice, Bear. But there are times when it is safe. For instance on a deserted, straight, country road. No traffic, tree lined beauty, no one is coming, and I can see for miles ahead. I hear you. You want to ride side-by-side, chatting and laughing, enjoying a respite from the hard climb you just did. But this is exactly when you are most distracted. You don’t know when a car is going to enter the roadway from an unseen driveway. And you can be sure, the driver is not expecting you in his lane…going the wrong way.
You know who wins that fight? The driver every time. The cops are going to blame you. The insurance company is going to blame you. The driver is going to blame you. The sheer weight of metal and death are going to blame you. Your fellow cyclists will commiserate with you, but in the end they’re going to understand you were in the wrong place at the wrong time.
Don’t be that example. Ride on your side of the road. Ride as far to the right as is safely possible. Ride defensively, predictably and stay alert. Pass only when it is safe to do so, and pass only on the left. When passing call out loudly: “ON YOUR LEFT!”
Here is an excellent blog post on lane positioning for cyclists. I haven’t fully vetted it, so I don’t yet know if I agree with all the points the author makes. Do you? Comment to let me know.
Love,
Your Bear
P.S.: It takes me a long time to write these posts. If you find them valuable, feel free to donate a couple bucks to my 2018 AIDS/LifeCycle ride.
Man Bites Dog: Escaping Canine Roughhousing
Eventually you’ll likely find yourself face to face with a dog while you’re cycling. They’re everywhere. Not all owners are properly trained. That means the dog may view you as a threat. You can probably tell: ears up, tail erect, attention fixed. You ride up to him, and the dog doesn’t move. You say, “good doggie, then,” but the tail doesn’t start wagging. You’ve got to pass, but you just know the dog is going to get aggressive, give chase, and possibly bite! What do you do?
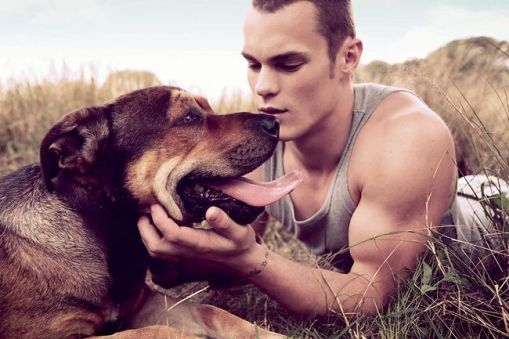
There are lots of answers out there (for instance, here and here). I’m going to give you the one that works when you approach the dog head on or if the dog is coming at you from the side. Saved me a couple times, most recently when a homeless guy’s unleashed dog tried to bite me on the bike trail.
- As you approach the dog, slow down a bit, making sure you’re in a sprinting gear.
- Let the dog approach, but not too close.
- Give it some auditory encouragement, “good boy” or “sweet dog” in soothing tones.
- Just as it gets to you, take off in a sprint as fast as you can.
The dog will likely give up, feeling it has chased you off. I definitely encourage you to read the links and be prepared. Little would ruin a ride more than a dog bite or an altercation with a recalcitrant owner.
Love,
Your Bear
Drink up!
Much to the chagrine of my riders, it has long been my conjecture that failing to drink enough (or eat enough) is the cause of 90% of all cycling woes. Riders don’t want to believe this. They want to blame the weather, the hills, the other cyclists, or … me! But the fact is that hydration is the easiest to overlook variable.
So, as the 2018 training season begins, I urge you to carry two waterbottle, preferrably 24-ounces. Make sure you have electrolytes with you. And drink no less than one water bottle per hour you are cycling. Fill them when the opportunity presents itself. Keep them clean when you get home. Put ice in them when the weather is warm.
Do this, and your cycling experience will be greatly enhanced.
I leave you with this: a video explaining the importance of drinking water. Happy hydrating!
Love,
Your Bear
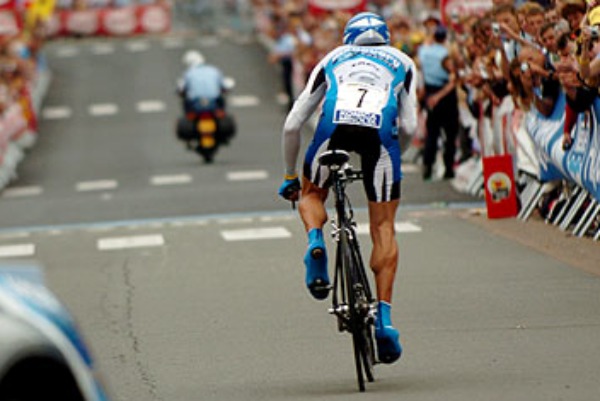
Climbing, Descending, and Flats TLDR: Pedal
I’ve written several posts on how to climb, how to descend, nutrition and climbing, and related safety issues. Please review them because this post doesn’t discuss the mechanics. Instead, I want to reiterate something I’ve said in many prior posts: to get anywhere on your bike, you have to move your legs. The prior two posts about cadence were leading up to this conclusion: the only way to keep yourself moving forward efficiently is to pedal your bike.

If you’re not pedaling on a climb, you’ll fall over. If you’re not pedaling on a flat, you’ll slow down fast and fall over. “Duh,” you say, “but what about descents? It will be much more efficient for me to use the descent as an opportunity to let my tired legs rest.” The answer is no, you should be pedaling.
There are two issues to unpack from that: (1) You’re too tired, and (2) You haven’t fully grocked the mechanics of moving your bike forward.
If you’re too tired to pedal on a descent, you’re probably working on the challenge of the ride you’re on. That does not meant it is too challenging for you, but it does mean you should consider pacing yourself. Check with your doctor to make sure the exercise you’re planning is right for you. Then read my blog posts on nutrition. 90% of problems like this can be solved by eating and drinking more.
Otherwise, the issue may be a mechanical one. (First, after 5 or so serious rides, are you still in pain or numb in the feet, knees, back, arms, or butt? You likely need a bike fit (remind me to do a post on this issue).) That means you’re not using the lessons in cadence we discussed the last two weeks; review them.
If fitness and mechanics are not the issue, then you just have to trust me on this: on your descents, PEDAL YOUR BIKE. On climbs (obviously). On flats (less obvious than you’d think). On descents. YES, on descents…always pedal.
The reason is simple. So long as your pedal strokes are engaging the wheel, you’re gaining momentum. On a descent, you have a huge advantage: gravity. If you don’t pedal, friction (road and wind) will slow you down. If you do pedal, you can partially or wholly overcome friction. The only real exception is if you’re descending too fast for your skill level, or your speed is so high that even on your hardest gear you’re not adding to momentum
The advantages are huge. Not only will you go faster on the descent you’re on, but you will gain momentum to pull you over the next, inevitable hill. And you’ll exhaust yourself less gaining that momentum to push you over the hill than waiting for the climb to pedal.
So the take away is this: learn to use your gears, use them, and pedal your bike on every inch of every mile that you possibly can.
Love,
Your Bear
Cadence and Fitness
Last week we talked about the mechanics of cadence: working with your gears to make your legs spin faster (more efficient) or slower (more power). The next questions are: How efficient? How powerful? The answer lies in the balance between muscle power and cardiovascular stamina.
Obviously, when moving your pedals a chain of well-developed muscles will help. Strong arms, a strong core, strong thighs, leading to strong calves are needed to power you up hills, or to speed your descents at a dizzying rate. (“Strong” doesn’t mean “giant,” however. Anyone can cycle and in doing so, will develop stronger and stronger muscles.) So, you may be telling yourself, drop the cadence by increasing my gear ratio to the hardest I can do and still move forward.
The problem with the power-through approach is that muscles get fatigued easily. The science behind muscle fatigue is complicated, but the gist is that your muscles can work under only so much load before running out of fuel and building up too many metabolism byproducts. The less of a load your muscles have, the longer you can go without refueling and rest.
That implies the correct answer is to focus on spin, or higher cadence, over power. Higher cadence requires that you move your legs rapidly around the pedals. (Which is one reason why the “clipless” pedals that you perplexingly “clip” into are so important: they give you power during the entire pedal stroke.) Spinning generally requires less muscle power and so generates less muscle fatigue. That means you can go further longer, though possibly at a slower pace. And that is where the balance comes in; spin at the pace which keeps you moving at your desired rate without exhausting your muscle power.
High cadence requires strong cardiovascular health. That means strong lungs and a strong diaphragm. Getting a large volume of oxygen pumping through your system by increasing lung capacity and throughput. The science may be hard, but this is something anyone who can sit on a bike can accomplish (not sure about the advise to avoid sodium as salt is a requirement for cyclists, I’ll look into it).
The single most important thing you can do to improve your cardiovascular health is to quit smoking.
If you’re embarking on this for the first time, see your doctor for guidelines for improvement. After that, the next steps are to cycle more. Breath deeply. Get your heart rate up. Increase the duration and intensity of your workouts.
The final question for today is what should your cadence be? On a flat road with no head- or tailwinds, presuming you’re in decent shape and have ridden for a while, but haven’t focused on cadence, you might try shooting for between 80 to 90 rpms. Your cadence meter will let you know. Up hills, that will drop to 70 or below. Downhill, it might not raise much, because gravity may overwhelm your efforts. Once you get stronger, you can try for around 100 rpms on the flat. There’s no set rule, and what is a fast cadence for some riders might be slow for another.
This post is for my friend Ty Whitehead. He was seriously injured on a ride this weekend. Please keep him in your thoughts that he recovers quickly and completely.
Love,
Your Bear
